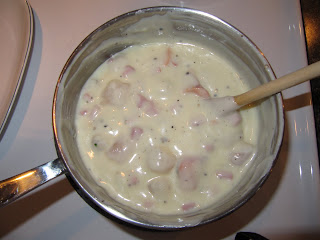
There's a potluck being held at work this Friday for a retiring staff member. Whenever there's a work potluck, I am known to bring either homemade sushi or seafood chowder (the latter being the more popular one with requests usually coming days in advance whenever there's a pot luck being advertised, followed by a minimum of 5 recipe requests every time - I'll save this 1 for a later post). Each of these dishes proves to impress, and yields a nice empty vessel for me to bring home :)
This time around I'll make sushi. It's lighter and healthier, and the seafood chowder is more of a warming comforting wintery dish (perfect for our annual Christmas potluck):) Actually, to be more specific and technically correct what I am making is futomaki - sushi is the more general term used to describe cooked vinegared rice topped with seafood.
I thought hey I'm making sushi, while I'm at it why don't I blog about it? I'm not sure how many people make their own sushi at home, but it's sooo easy, so healthy and so delicious.
When I'm making sushi for other people, especially when it's being made the day before as is the case here, I always use fish that is cooked and I avoid the raw stuff for obvious reasons. We have on occasion, however, purchased sushi grade salmon from a local fishmonger, and we feast on salmon sashimi and sushi along with raw oysters (with my husband's special fiery sauce that I still think he should try to sell to Rodney's Oyster House downtown because it is an AWESOME recipe) **patting my honey on the back**
The sushi rolls I am making are a modified California Roll.
The ingredients, equipment and instructions are as follows:
Ingredients
5 cups Calrose rice
8 tbsp sugar (a little < 2 tbsp per cup of uncooked rice)
2 tsp sea salt
1/2 cup white vinegar or rice vinegar
nori sheets
3 ripe avocados
2 english cucumbers
imitation crab legs
masago (cured caplin roe - optional)
wasabi paste
soya sauce
Rice Paddle or curved wooen spatula
Basting Brush
Sushi Mat
Non serrated knife
1) Rinse rice in several changes of cold water. Cook rice in rice cooker.
2) While rice is cooking, prep filling ingredients and equipment. The key to making sushi with ease is to be organized and have everything prepared and organized 'assembly line style' before commencing the rolling:
Cut ends off cucumber, matching the length of the cucumber to the dimension of the nori sheets (. Cut cucumber longitudinally into quarters. Remove all seeds from cucumber with knife. Set aside.
Slice imitation crab legs longitudinally (approx. 1/4 inch thick). Set aside.
Remove peel and pits from avocados. Slice avocados into thin slices (approx. 1/8 inch thick). Set aside.
Set masago aside with a spoon.
Prepare nori sheets and bamboo rolling mat and set aside.
Prepare a small bowl of room temperature water with a basting brush. Set aside.
Have ready a plastic rice paddle or flat wooden spatula (no holes) with a dipping bowl of water.
Set aside a clean cutting board, and a non serrated knife sitting in a tall vessel filled with luke warm water.
Transfer cooked rice into a large mixing bowl. Stir in sugar, salt and vinegar, mix thoroughlly, allowing the stirring process to blend ingredients and also to cool the rice. Rice should have a shiny appearance. Let stand for 10 minutes.
Place a sheet of nori on rolling mat, shiny side down, with perforations perpindicular to the bamboo in the rolling mat, and with edge of nori sheet flush with edge of rolling mat closest to you.
With rice paddle, starting at front edge spread rice over top of nori sheet, *press with downward pressure so as to compact, flatten and 'push' rice rather than 'pulling' and 'spreading' rice as this will tear the nori. Use enough rice to make a 1/4 inch thick layer covering approx. 3/4 the nori sheet. This technique requires a little practice. Dip the paddle in water as required to moisten and avoid sticking of rice to the paddle.
Arrange imitation crab legs, cucumber, avocado, (and masago if used) in center of rice layer. (Visually divide rice layer into thirds. Filling ingredients shouldn't extend beyond middle third portion of rice layer or roll will be too full and ingredients will be squeezed out during rolling)
Lift front edge of rolling mat, and start rolling (away from yourself).
Use your thumbs and palms to advance roller and curl your fingers inside the roll to keep ingredients snugly 'tucked in' as you roll. Ensure the rolling mat is squeezed rather tightly as you roll or else rolls will be 'loose'.
Once the edge of the rolling mat is in contact with the rice layer on the far side, pull out on far edge of mat, and pull rolled part of mat towards you to ensure roll is tight.
Lift the edge of the mat up and continue advancing rolling mat until all rice is encorporated into the sushi roll and you are left with just the remaining 1/4 of the nori sheet.
Lightly brush the remaining end of the nori sheet with water, and finish rolling (the water will help the nori stick to itself ensuring that your roll will not come apart).
"Wa-La"!! You've done it, you've made a Maki Roll!! Set roll aside on a cutting board and start the process all over again for the next roll.
Once all rolls are constructed, use your wet knife to slice into about 1 1/2 inch thick discs.
Arrange on serving platter. Serve with wasabi paste and soya sauce for dipping :)
yummmmy, gotta sudden craving for some nice warm sake,
Cheers!! :)
Being a busy mom and juggling a career with raising a young family, it's often tempting after a long day at work to open up a can or a box of something for dinner resulting in a low effort, pre-packaged, processed, "meal" with low nutritional value. I am committing to thinking outside the can.
Countless numbers of us, on a daily basis, are faced with the challenge of filling multiple roles. We must be spouses, parents, professionals, etc., and still find time and energy after all that to be health-conscious individuals! Life shouldn't be an exhausting struggle, it should be a collection of one enjoyable, memorable, fulfilling, experience after another, should it not? I mean, pardon the cliché, but life's too short to let it be anything else.
I am a self-proclaimed food hobbyist on a quest to find delicious, healthy, fast, easy-to-make recipes and to successfully make those food adjectives actually belong together in a sentence. I am looking for after work meals that don't come out of a can, that I can enjoy preparing after a long work day, that my family will enjoy eating, and that will allow me to rest assured knowing that we are eating healthy. When I find these meals, I wish to share them with others. Cheers :)
Wednesday, April 28, 2010
Monday, April 26, 2010
New Kitchen (Almost)
"A-Foraging we will go" - The Mushroom Foray
With kitchen renos finally being put behind us (PHEW!!), we were finally able to get around to our pre-planned mushroom foray. A mushroom foray is the term used by shroomers and mycologists to describe the act of going out into nature and foraging for mushrooms - one of our favorite activities.
We donned our long sleeves, and backpacks, applied the mosquito repellant, and with our mushroom field guides, baskets, brown bags, and exacto blades on hand,
hoping we weren't too late (or too early), we went out on our quest to find one of our favorite types of mushrooms - morels...yummmmm!!
We went to our usual site where we have had luck in the past finding morels.
The conditions, as suspected, were very, very dry as was our hunt :( We couldn't find a single mushroon, not even the types that can grow in drier conditions!! I don't think this year will give a good yield at all...we are going to venture out in a couple of weeks time and try our luck again.
Since I have no morels and hence no tasty morel recipes to share with you, I will write a little blurb about morels and foraging for them.
Types of Morels
There are 2 types of Morels:
1) False Morels (NOT edible)
2) True Morels (edible)
False morels are poisonous. The poisonous chemicals contained in false morels are gyromytrium and monomethylhydrazine (MMH), and can be lethal! Common names of false morels are Beefsteak Morel, Red Morel, Elephant Ear, Brown Bonnet, Snow Mushroom, Snow Bank Morel, Walnut and Bull Nose.
True Morels come in 3 varieties (all 3 are hollow with off-white stems):
1) Black
2) Yellow (aka White)
3) Half Free
Black Morels sporut the earliest. Common names include Early morels, Grey morels, Burn-Over morels, Narrow-Capped morels, Witch’s Caps or Johnny Jump-Ups.
Black morels can be gray when they first sprout, and they grow to be from one-half inch to more than one foot tall!
Black morels cause adverse reactions more often than the other two types of true morels. Symptoms can include an upset stomach and loss of muscle coordination, which is exacerbated by consuming alcohol; first-time eaters should take only a few bites and avoid alcohol!!
Yellow Morels sprout last out of the 3 types of true morels.
They are also called Sponge mushrooms, Gray morels, Brain mushrooms, Honeycombs, Sponges, or Domes.
They can range in color from whitish to yellow to gray to honey brown.
They can also grow to be a foot tall. Some can grow to be huge, with a very thick stem; some experts classify them separately and call them Giant morels, Big Foots or Thick Footed morels.
They are the most prized type in terms of flavour and texture.
Half Free Morels sprout after Black Morels do, and growing continues on through Yellow Morel season.
Half Free morels are also called Peckerheads or Cows Heads.
Half Free morels are visually distinct from Black and Yellow morels in that their heads are quite small. Also, caps of Blacks and Yellows are attached to the stem at their bottom, whereas the Half Free cap is attached at about the middle. A longitudinal cross section would reveal the attachment of the cap to the stem leaving about half of the cap hanging, or “half free.”
Morel Anatomy
Morels are roughly cone-shaped, with a cap wrinkled like a brain, intricately indented, and with a light-colored, sinewy-looking stalk.
The morel (the part of the mushoom that we see above ground) is the “fruit” - the reproductive part of the mushroom; the main portion is a fibrous mat that resides underground, called the mycelium. The pitted cap of the morel bears spores, which help ensure reproduction. When spores fall to the ground, they germinate to grow the mycelium and hyphae, which are tendrils that reach to the surface for nutrients and that produce the morel. The hyphae extend from the underground nutrient warehouse, or sclerotia, which is about the size of a potato.
Where do Morels Grow?
There are indicator trees where you would be more likely to spot morels....the main ones being Elms and Maples.
Elm Tree and Elm Leaves
Morels like sandy or clay like conditions. They like spring temperatures (15C in the daytime and no colder than 5-10C in the night), usually in April in ON. The best time to look is right after a rain.
Ravines are a great place to look and in stream and river beds, and in wooded areas especially where there are live or dead decaying elm trees, and don’t forget to look within thick underbrush. Many people won’t go in there and you may be surprised what you will find!!
How do we spot morels?
The trick is to lie low - get down close to the ground and scan the ground ahead of you instead of always looking straight down at it. Take long, low strides - eyes should be focused 10 to 15 feet ahead. Kids are great little morel hunters because they are lower to the ground, have better eyesight and more energy, and notice the shapes.
Morels are masters of camouflage, blending in with leaves, faded grass and twigs. Watching for differences in texture helps to spot morels.
Another useful technique is to walk along the base of a slope and look uphill so the morels appear in silhouette or are back-lit. Or start at the bottom of a ravine and walk up the hill looking about 25 to 30 feet in front of you so the morels will silhouette against the horizon. It is much easier to spot a morel at that distance rather than under your feet.
A method that works well is to look near the base of trees or around fallen logs, doing lots of squatting and gently moving leaves aside with your hands or a stick--gently, so as not to squish any morels lurking within!
Many shroomers say never to pull a morel out of the ground, as that will destroy the underground mycelium system. One should instead cut it off with a blade.
How are Morels Stored?
Morels are precious because they have not taken to commercial growing so virtually all of the morels on the market have been picked in the wild.
Obviously drying morels is an absolute necessity. Dried morels stored in an airtight container, have an almost indefinate shelf life, and they can easily be reconstituted by soaking in warm water with pretty good results. The water can be used as stock after soaking the morels. It takes 8-10 lbs of fresh morels to yield 1 lb of dried morels so when purchasing dried morels, remember a little goes a long way!!
So wish us luck on our next forray!! I hope to be able to share some morel recipes in the near future! ;)
Cheers!!
Thursday, April 15, 2010
Linguine and Seafood Carbonara
I spent a lovely afternoon today with a friend at an indoor playground. We had the whole place to ourselves!! I love having weekdays off!! While the kids were having an absolute blast because they had the whole run of the place, we sipped on coffee and I poured over some cookbooks in search of a dinner recipe for tonight....I already had an idea what I was looking for, I felt like something creamy, seafoody and savory - and there it was, seafood linguine alfredo. Yummmmm!! I had a conversation with another friend a few days ago, and carbonara was discussed, so I decided to modify the alfredo part of the recipe, then I decided to modify the whole thing, wing it, and make up my own recipe from scratch. Here's how it went:
Ingredients:
3 tbsp. all purpose flour
3 tbsp butter
1 1/2 cups hot milk
1 cup grated extra old white cheddar cheese
Black pepper to taste
3/4 cup broccoli florets
1/2 cup chopped red pepper
1/4 cup tiger shrimp peeled, halved
3/4 cup salmon filet cut into 1 inch cubes
1 cup bay scallops
1/2 cup kolbassa sausage cut into 1/4 inch cubes
Linguine (about 4-5 cups cooked)
Parmesan cheese grated
1) Prepare all raw ingredients before starting to cook:
2) Prepare Mornay Sauce (sorry for the lack of photos of the steps in making this sauce, I needed both hands and quick timing is essential to avoid sticking):
Start with a roux - heat milk in microwave until almost scalding. Over medium-high heat, melt butter in a sauce pan, when butter is sizzling add flour, STIR CONSTANTLY, when butter and flour become golden yellow, gradually pour in hot milk (hot milk will create a smooth consistency to the bechamel sauce more readily than cold milk, and cold milk may create lumps), STIR CONSTANTLY until bechamel reaches a thick creamy consistency. Add grated extra old white cheddar cheese (extra old because the sharpness of this cheese results in a much nicer flavor), stir constantly until cheese has melted. Reduce heat to medium, add black pepper.
3) Cook Fish, steam veggies, and par boil pasta
=> Add kolbassa, and fish to the Mornay sauce.
=> Let simmer on medium heat until fish becomes opaque, stir occasionally (approx. 15 minutes)
=> Steam veggies in the microwave until tender (about 2 mins on high depending on microwave strength)
=> While fish is cooking, boil the linguine until almost el dente
4) Assemble the pasta dish and finish cooking
=> Transfer pasta and veggies to a non stick pot
=> Add sauce and simmer over medium-high heat to reduce and thicken to desired consistency, stirring occasionally (water from veggies and fish may thin the sauce)
=> Voila!
5) Serve with fresh grated parmesan and ground pepper
Total prep. time approx. 45 minutes. Enjoy!!! :)
Wednesday, April 14, 2010
More posts to come (I promise!!)
*siiigh* Well we've entered phase 6/8 of our kitchen reno, we can finally see the light at the end of the seemingly neverending tunnel....countdown is on - 10 days to go til we reach our deadline - appliance delivery day *jumping up and down clapping*, I'll post some pics later....when we're done, I'll be a busy beaver once again in my newly updated, wonderfully modern kitchen and there will be more posts, I promise *wink*
I think there will be a mushroom foraying trip this coming weekend, so hopefully with any luck there'll be some tasty morel recipes to come!!
Cheers! :-)
I think there will be a mushroom foraying trip this coming weekend, so hopefully with any luck there'll be some tasty morel recipes to come!!
Cheers! :-)
Thursday, April 1, 2010
Broccoli and Tomato Quiche
Quiche is definately a dish that meets my "suitable to prepare after work" criterion. It's quick and easy, healthy, filling, and oh so delicious.
I like to make mine with broccoli, tomato, and cheese, no meat, I feel there's enough protein from the eggs.
Ingredients:3-4 eggs
1/2 cup evaporated milk
1/2 cup low fat sour cream
2 cups small broccoli florets
1/2 cup chopped onion
3 cloves of garlic finely chopped
1 plum tomato thinly sliced
1/2 cup grated swiss cheese
1/4 cup grated parmesan cheese
2 tbsp thyme finely chopped
2 tbsp olive oil
salt and pepper to taste
1 pie shell (if you don't have time/energy to make your own pie crust and roll out dough after work, there's always Tenderflake brand pie shells, and if you're going this route, as I have many times, and feel no shame for doing so, get the deep dish pie shell, the regular will result in a spillover in your oven!!)
Saute broccoli onion and garlic until tender (~10 min)
Spread grated Swiss cheese over bottom of pie crust
Whisk eggs, evap. milk, sour cream, thyme, salt and pepper in a bowl
Spread Broccoli, onions and garlic over the cheese layer
Pour egg mixture over vegetables
Arrange plum tomato slices on top of the quiche
Sprinkle the grated parmesan cheese over the tomato layer
Bake at 375F for 35-40 minutes until a knife inserted into center comes out clean
Let stand for approx. 5-10 minutes before slicing to serve hot, or let cool and serve at room temp.
I usually serve the quiche with a garden side salad
Enjoy!!!
Chicken with Pickled Mustard Green Stir Fry
Yummmmmy, yummy, yummy!! This is a recipe I learned from my husband, who learned it from his mom (who is an amazing cook I must say, and whose dishes I someday hope to master). It is super easy, and packed with flavour!!
Ingredients:2 skinless boneless chicken breasts cut "against the grain" into 1/2 inch strips
1 pkg. pickled mustard greens (drained and chopped)
2 tomatoes cut into wedges
2-3 Ontario grown king mushrooms sliced lengthwise (~1/8 inch thick)
1 cup bean sprouts
3-4 garlic cloves finely chopped
2 tsp finely chopped ginger root
1 tsp white pepper
1 tbsp soya sauce
1 tbsp sesame oil
1/2 tbsp oyster sauce
2 tbsp veg oil
Marinate the chicken in soya sauce, sesame oil, oyster sauce, and white pepper
Heat veg oil in large frying pan
Saute garlic and ginger
Add marinated chicken breasts to pan, saute until chicken is cooked (~10 minutes)
Add pickled mustard greens, tomatoes and mushrooms, saute until mushrooms are tender (~5 minutes)
Stir in bean sprouts, remove from heat, the bean sprouts do not need to cook, the heat from the stir fry will soften the bean sprouts sufficiently.
I like to serve this with a side of steamed rice. This stir fry bursts with flavour, and the pickled greens make it tart so the rice helps to absorb some of that tartness...
Total prep time ~30 minutes!
Thanks mom!!
Mmm-Mmmeatloaf!!
One of my favorite meatleof recipes is one that I adapted from a Weight Watcher's recipe book. It has an Italian flare, and it's delicious! Most importantly, it's quick, easy peasy, and of course healthy.
Ingredients:
2 lb lean ground beef
1 medium sized yellow onion finely chopped
3 cloves of garlic finely chopped
1/2 green pepper finely chopped
3/4 cup ketchup
2 tbsp dijon mustard
1 tbsp worchestershire sauce
1 tbsp fennel
2 tbsp Italian seasoning
3/4 cup Italian seasoned dry bread crumbs
2 large eggs
1/4 tsp salt
1/2 tsp black pepper
1/2 cup pasta sauce
2 tbsp grated parmesan cheese
Preheat oven to 400F
Hand mix all ingredients (except pasta sauce and parmesan) in a large mixing bowl. Make sure ingredients are blended together well.
Spray a non stick loaf pan with non stick cooking spray.
Transfer mixture to loaf pan, flatten on top with hand.
Spread pasta sauce over top, and sprinkle with parmesan.
Bake at 400F for 45-60 minutes.
Let stand for approx 10 minutes before slicing.
Use 2 large spatulas to loosen from sides of pan, and transfer onto serving platter.
I like to serve this meatloaf with garlic mashed potatoes, and this salad:
Baby spinach
Sliced pears
Dried cranberries
Chopped red onion
Roasted walnuts
Goat cheese crumbled (or blue cheese)
Creamy Poppyseed Dressing:
1/4 cup white sugar
1/4 cup white vinegar
2 tbsp chopped onion
2 tbsp strawberry jam
1 tbsp poppyseeds
1/2 cup vegetable oil
Blend 1st four ingredients at high speed, drizzle in veg. oil while blender is running to emulsify the veg. oil
Garlic Mashed Potatoes:
Mash 5 medium boiled potatoes
Stir in 1/3 cup butter
2 garlic cloves pressed
1/4 cup grated parmesan cheese
2 tbsp finely chopped basil
1/4 tsp salt
1/2 tsp black pepper
Prep time, approx. 20 minutes, cook time ~50 minutes.
This meatloaf is sooo flavorful, it's always a hit with the fam, bon appetit!!
Subscribe to:
Posts (Atom)